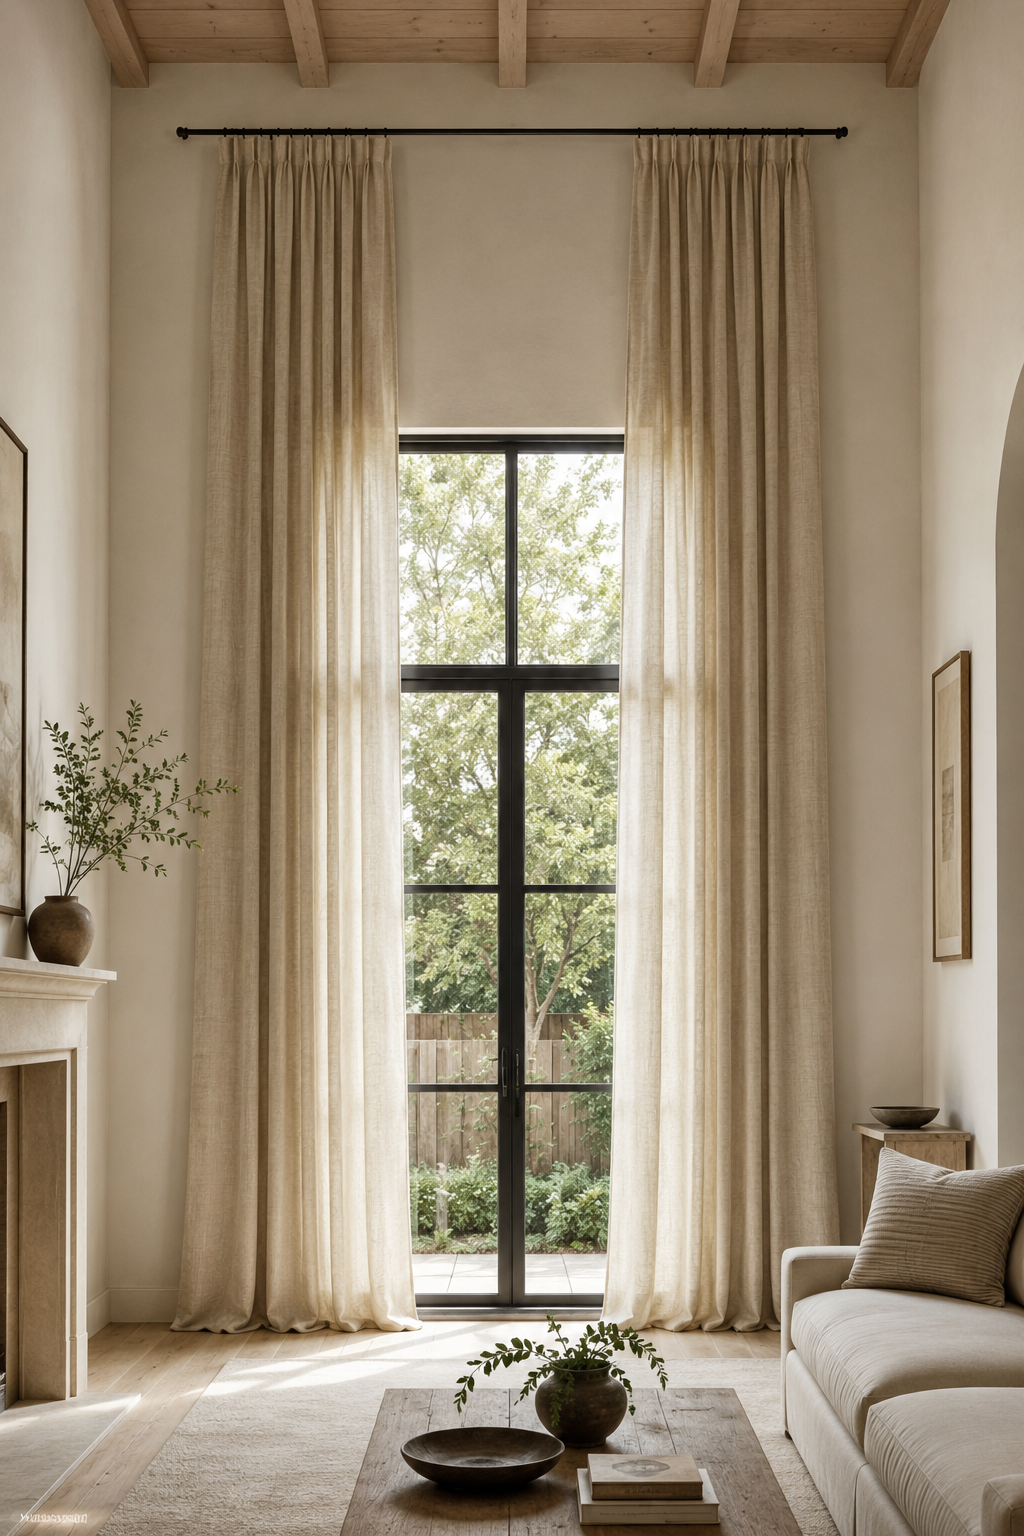
How to Hang Curtains So Your Ceilings Look Taller
Disclosure: this post contains affiliate links. If you buy something through one, I may earn a small commission at no extra cost to you.
In my first apartment I hung curtains inside the window frame, because that's where the window was and it hadn't occurred to me to put them anywhere else.
They looked like they were apologizing.
Curtains are the cheapest way to change how tall a room feels, and almost everybody gets them wrong in the same three ways: too low, too narrow, too short. Fixing all three costs about the same as doing it wrong, which is the frustrating part.
Here are the actual numbers.
1. Rod height: go higher than feels reasonable
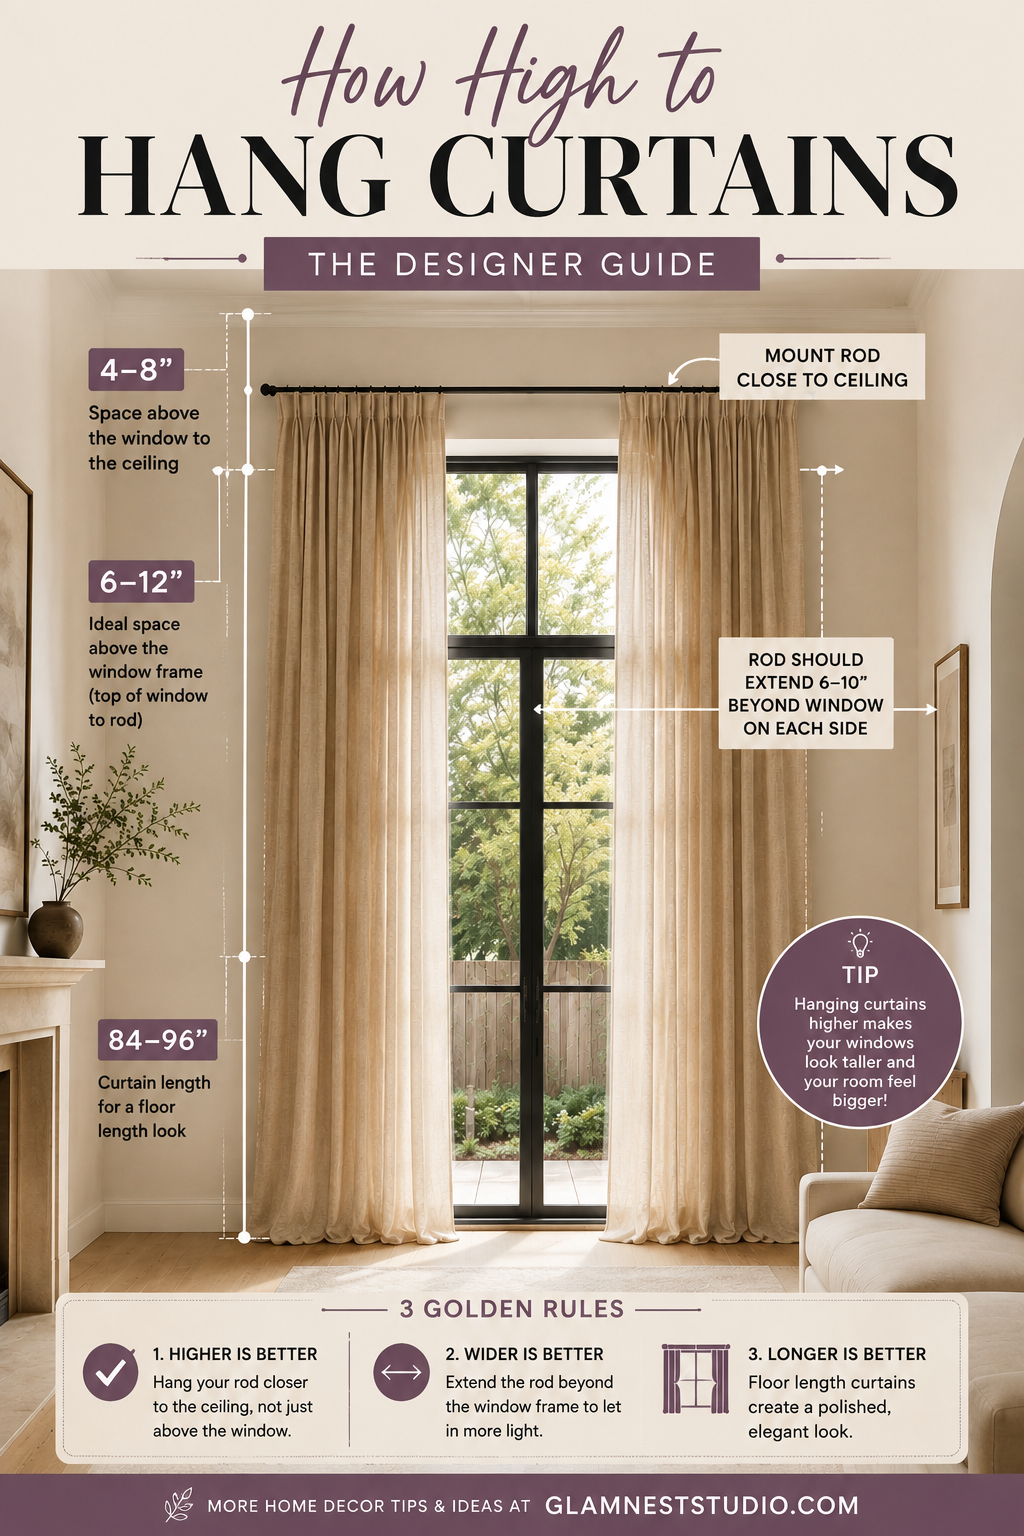
The rule: hang the rod 4 to 6 inches below the ceiling, or two-thirds of the way between the top of the window frame and the ceiling whichever is lower.
If your ceiling is 9 feet or higher, don't go all the way up. Around 6 inches below crown molding or ceiling line is plenty. Beyond that the proportion tips and the curtains start looking like they're hiding something.
Why it works: the eye reads the top of the fabric as the top of the window. Move that line up and the window appears taller, which means the wall appears taller. It's the single most effective visual trick in a room, and it costs nothing extra the same rod, the same brackets, just mounted higher.
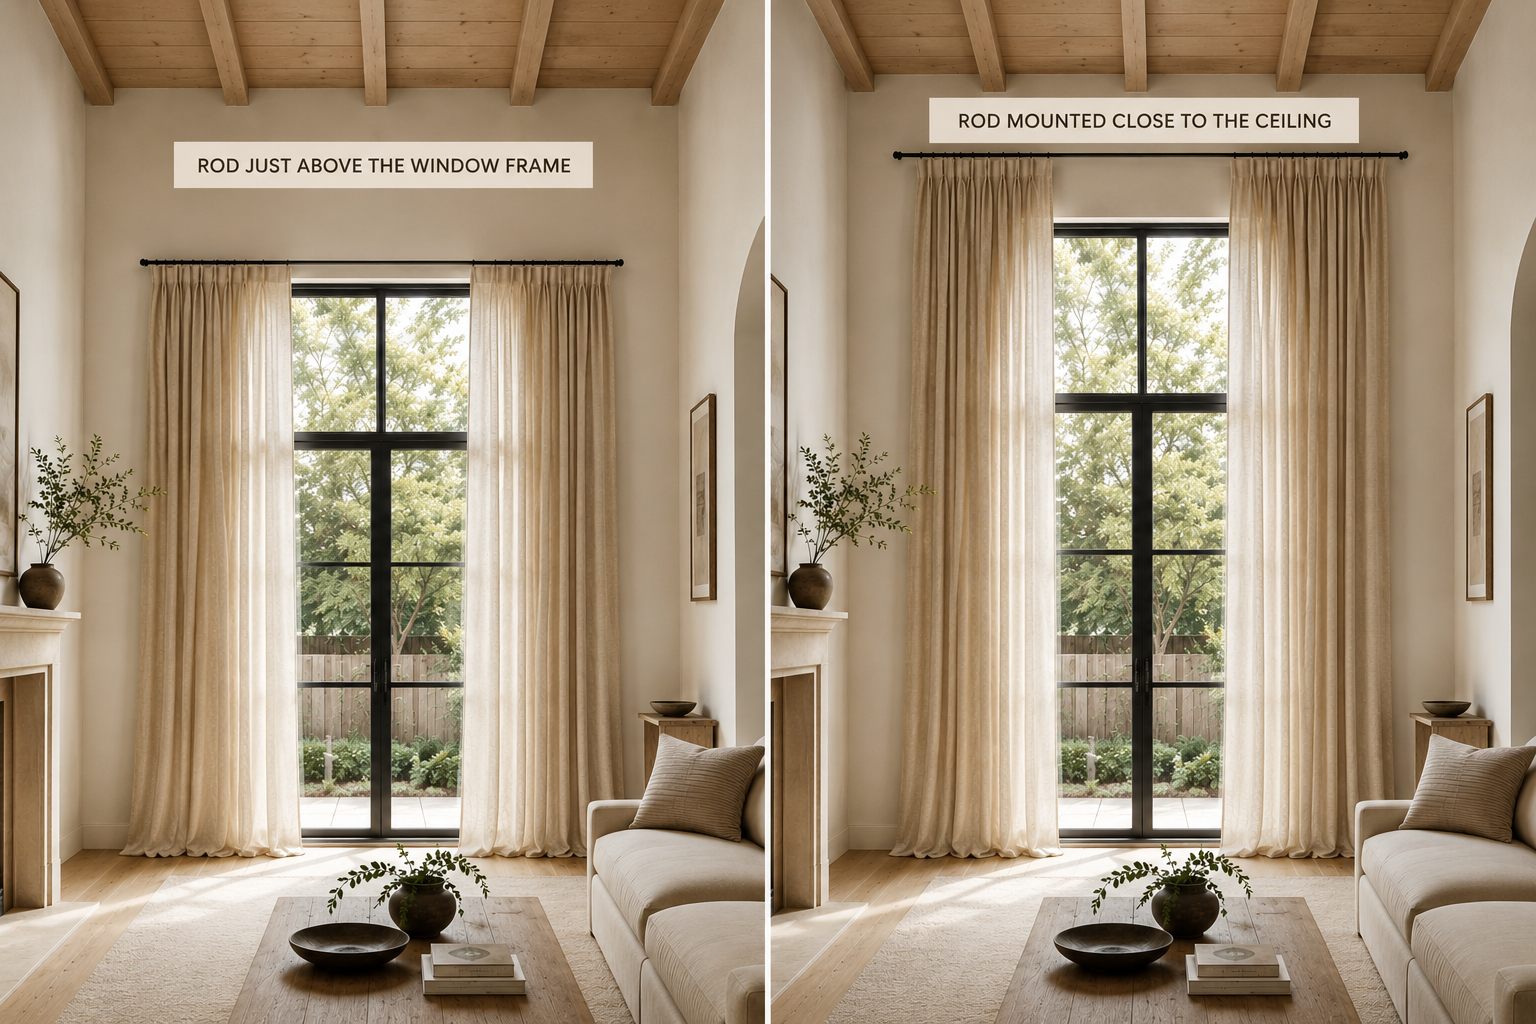
One caveat: if you have deep crown molding or a very low ceiling, mount just below the molding rather than crowding it. A rod jammed against trim looks like a mistake, not a decision.
2. Rod width: much wider than the window
The rule: the rod should extend 8 to 12 inches past the window frame on each side.
Most people buy a rod that's roughly the width of the window, which means the curtains even when fully open cover part of the glass. You lose light every day of the year, and the window looks narrower than it is.
Extending past the frame lets the panels stack on the wall instead of on the glass. More light, wider-looking window, and the curtains look like a deliberate feature rather than a functional necessity.
If you have space, go wider still. On a narrow window, 12 to 15 inches per side can make it look substantially larger. On a wide window you can pull it back to 6 inches.
If the wall runs out a window near a corner extend as far as you can on the side that has room and accept the asymmetry. It'll look better than a rod that's too short.
3. Length: floor length, essentially always
Curtains that stop at the windowsill or just below it make a room look shorter. There's no aesthetic version of this; it's a practical choice for radiators and kitchen sinks, and it should be treated as one.
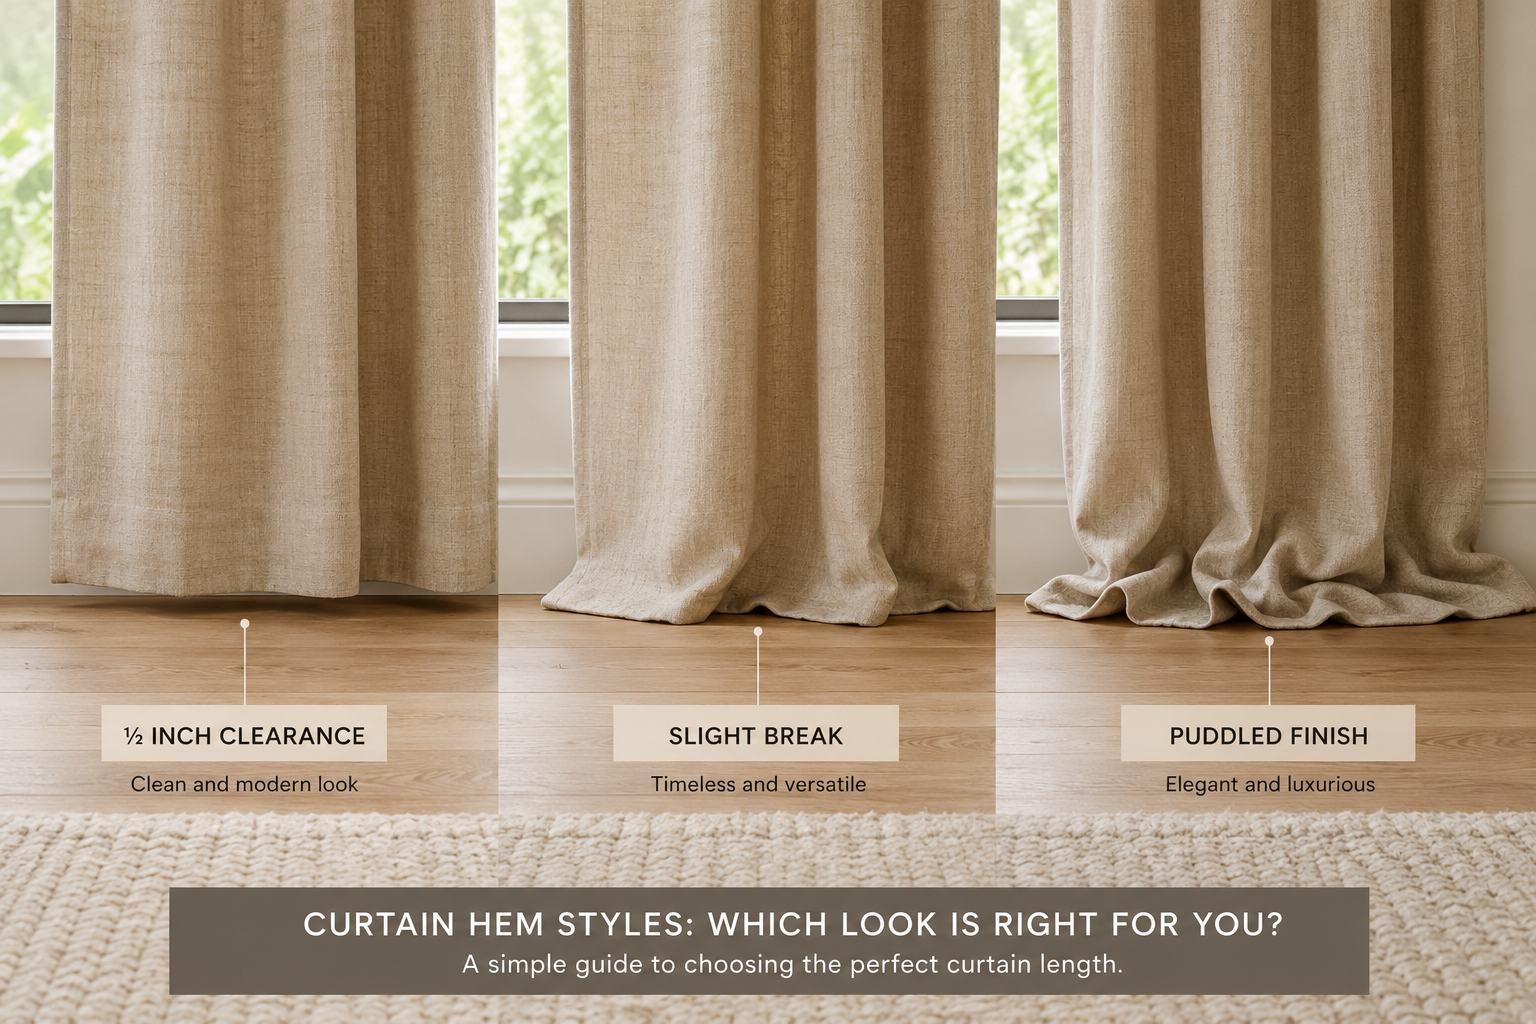
Three acceptable finishes at the floor:
- The kiss. Panels just touch the floor, or hover about half an inch above it. Cleanest, easiest to vacuum around, best for anywhere with pets or heavy traffic.
- The break. Panels are 1 to 2 inches longer than the drop, so they fold slightly at the floor. Softer, more relaxed, hides small measurement errors.
- The puddle. 3 to 6 inches of extra fabric pooling on the floor. Dramatic, gathers dust, needs rearranging every time you vacuum. It has to look intentional or it looks like a mistake.
What to avoid: anything that ends more than an inch above the floor and isn't sill-length. The half-inch-to-two-inches-above-the-floor gap is where curtains look like they shrank.
Measuring for length: measure from where the rod will be not where it currently is down to the floor. Then subtract the drop of the rings or hooks, usually 1 to 1.5 inches. Measure at both ends of the window; floors are rarely level, especially in older buildings.
4. Panel width: this is the one everyone skips
The rule: your panels combined should be 2 to 2.5 times the width of the window.
A single panel that's exactly the width of the window will hang flat and stretched when closed. It reads as a bedsheet. The fullness the folds is what makes curtains look like curtains.
For a 36-inch window you want roughly 72 to 90 inches of total panel width, which usually means two panels. Ready-made panels are typically 50 inches wide each, so two panels covers most standard windows adequately and one does not.
This is where cheap curtains most often fail, and it's not about fabric quality. A $30 pair of panels with proper fullness looks better than a $90 single panel hanging flat.
5. Header type, briefly
The header is the top of the curtain, and it determines how the folds form.
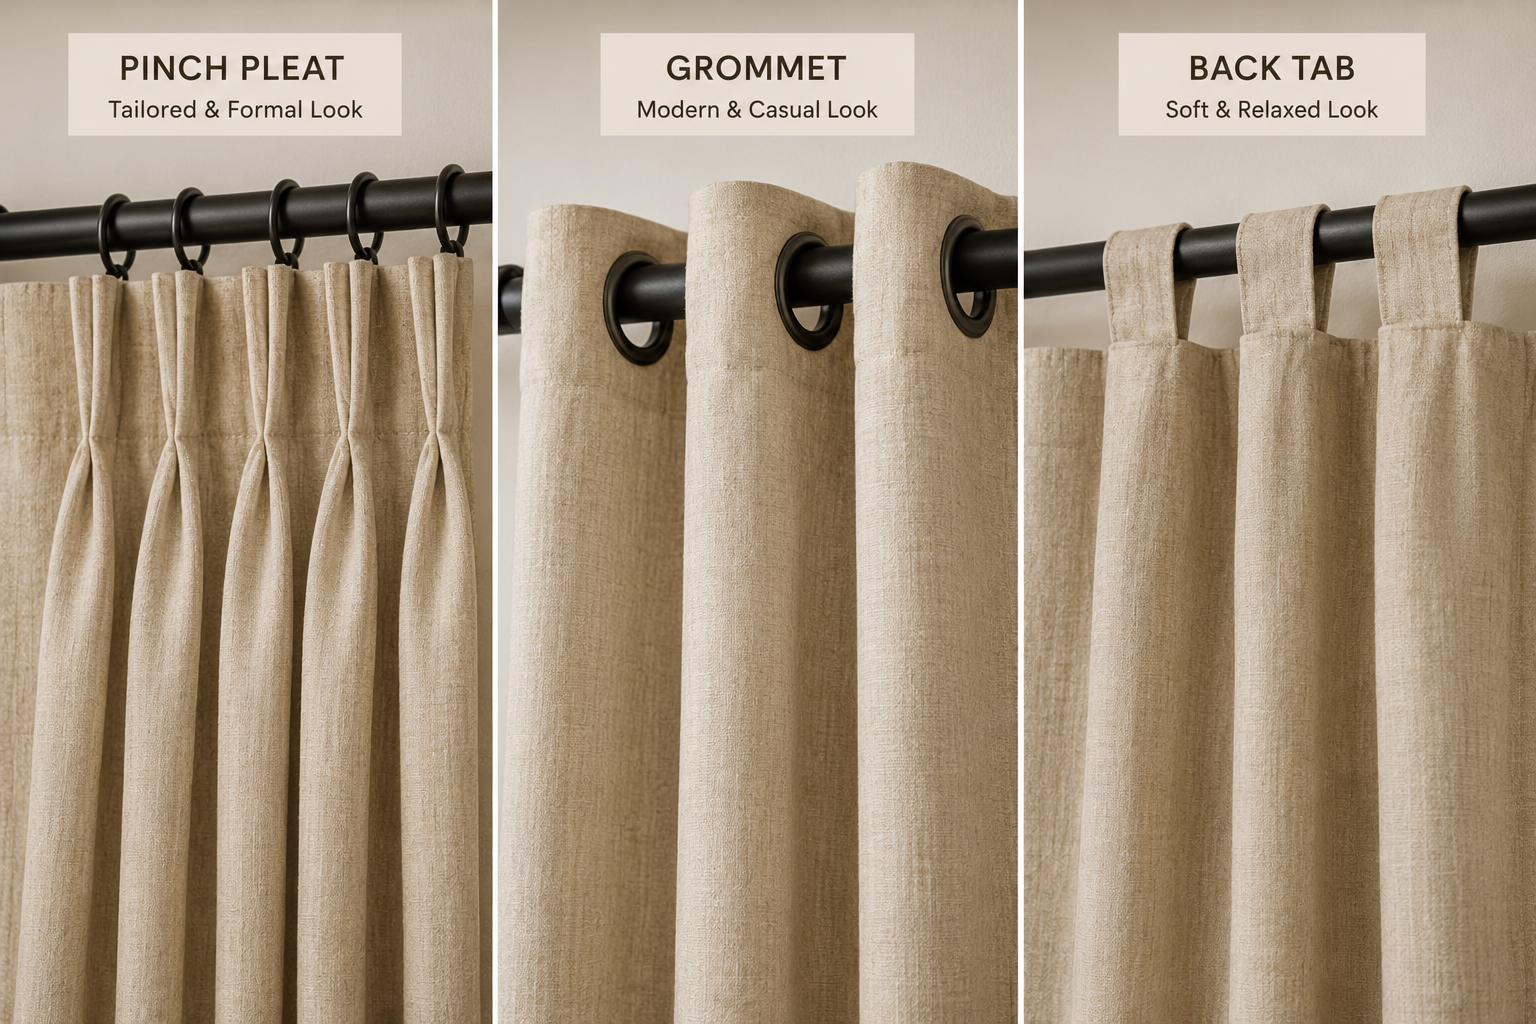
- Pinch pleat — most tailored, deepest folds, needs rings or hooks. Best-looking option. Costs more.
- Grommet (eyelet) — metal rings punched through the fabric. Modern, easy to slide, folds are wide and uniform. Good middle ground.
- Rod pocket — the rod threads through a sleeve. Cheapest, gathers tightly, and it's a pain to open and close. Fine for panels you never actually move.
- Tab top — fabric loops over the rod. Casual, and the loops leave visible gaps at the top.
- Back tab / hidden tab — loops on the back, so the curtain sits close to the rod with clean folds. Underrated, and my pick for most rooms.
If you want the tailored look without the price, pleat hooks can convert back-tab panels into pinch pleats for a few dollars.
6. Weight and fabric
Thin, light panels blow around, hang badly, and look cheap regardless of how you mount them. Weight is what makes fabric fall in clean vertical lines.
- Linen or linen blend — beautiful drape, wrinkles permanently, softens light nicely
- Cotton and cotton blends — reliable, wide price range, hangs well if it has some weight
- Velvet — heavy, blocks light and drafts, formal
- Polyester — the most common and the most variable. Some is fine; the very cheap stuff has a sheen that reads as synthetic across the room.
If your panels are too light, sew-in drapery weights in the bottom hem cost a few dollars and fix most of the problem.
Steam them after hanging. Fold creases from packaging can take weeks to fall out on their own, and nothing undermines nicely hung curtains faster.
7. Renting? You still have options
Most of the above needs two brackets and a drill. If you can't drill:
- Tension rods work inside a window frame, which loses the height advantage but is better than nothing
- Command-style curtain rod brackets hold light panels only. Read the weight rating and believe it a rod coming down at 3am is memorable.
- Ceiling-mounted track, if you're allowed a few small screws in the ceiling. Gives the maximum height effect.
More renter-safe approaches in the guide to decorating without drilling → How to Decorate When You Can't Paint or Drill.
What this actually does to a room
Curtains hung high, wide and long are one of three changes I'd make in any room before buying anything new. The other two are fixing the lighting → 10 Common Home Decor Problems and getting the rug size right → Rug Sizing: The One Guide You Actually Need.
All three are about the same thing: making a room's proportions read correctly. Nothing you buy compensates for proportions that are off. That's true of rooms, and it's true of clothes for exactly the same reason → Why Your Clothes Fit But Don't Look Right.
In the last apartment I rented, moving the rods up 7 inches and out 10 inches on each side took an afternoon and about $40 in longer rods. The ceiling looked close to a foot higher. Nothing else in the room changed.
The measurements, in one place
- Rod height: 4–6 inches below ceiling, or two-thirds up from window frame to ceiling
- Rod width: window width + 8–12 inches on each side
- Panel length: rod to floor, minus 1–1.5 inches for rings
- Total panel width: 2–2.5× window width
- Floor finish: half-inch clearance, or 1–2 inch break
Measure twice. Ready-made panels come in fixed lengths usually 84, 96 and 108 inches and buying the wrong one is the most common way this goes wrong.
Affiliate Disclosure
Some links in this post are affiliate links. If you buy something through one, GlamNestStudio may earn a small commission it doesn't cost you anything extra. I only link to things I'd recommend to a friend, and I've used or genuinely researched everything mentioned here. It's what keeps the guides on this site free.
Before you go
More on the changes that shift a room's proportions lighting, rugs, layout across the guides on GlamNestStudio.